Before I attempt to open up devices I always like to take a look at some pictures so I know what to expect; for the Empatica E4, there weren't any online anywhere. I went ahead and took some in case anyone else wants to replace the battery without shipping it to Italy.
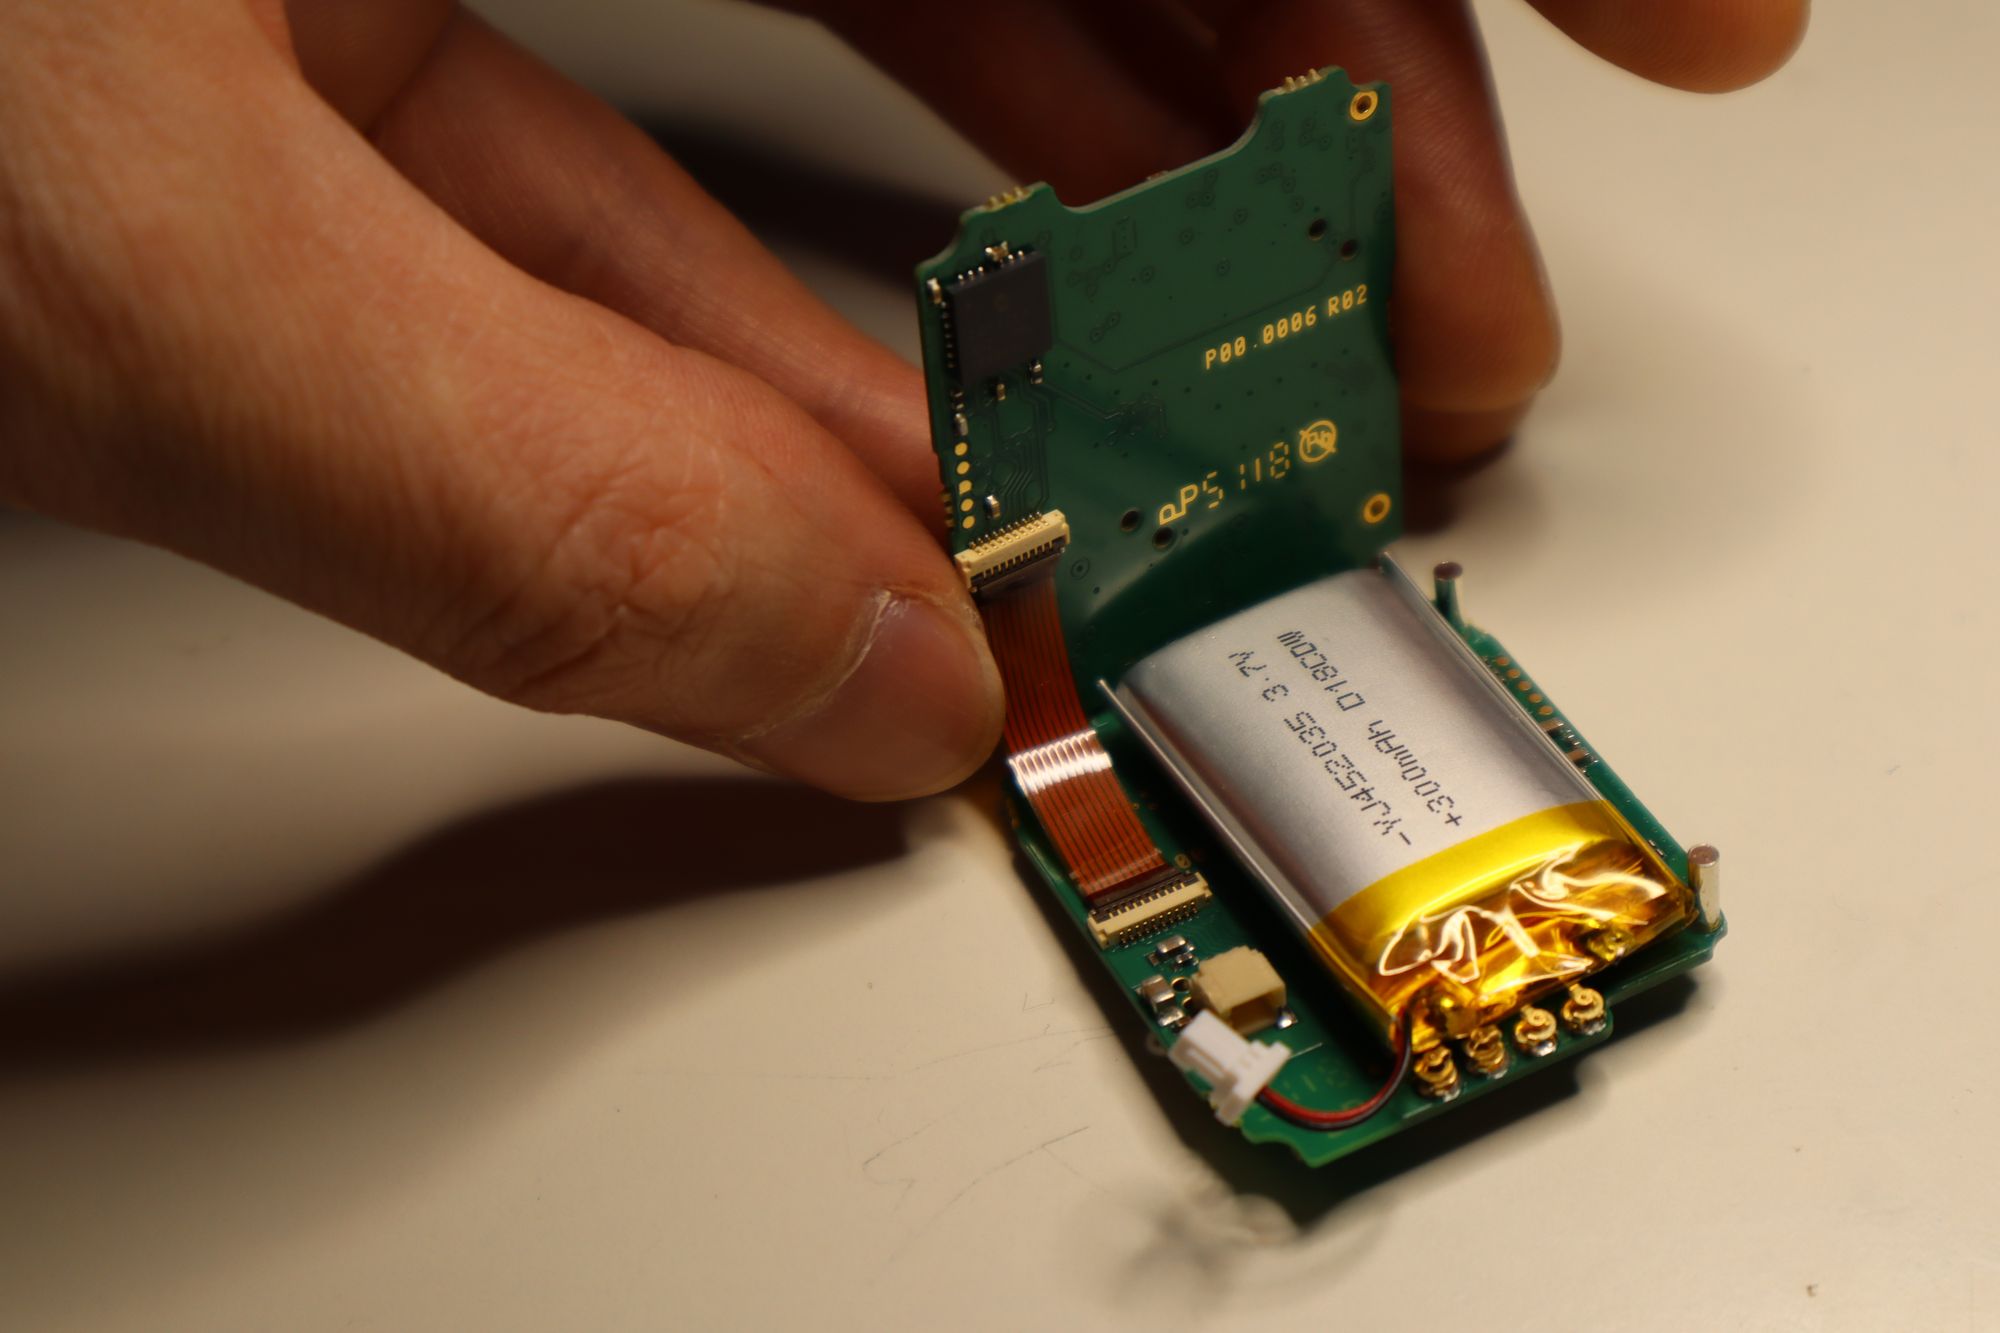
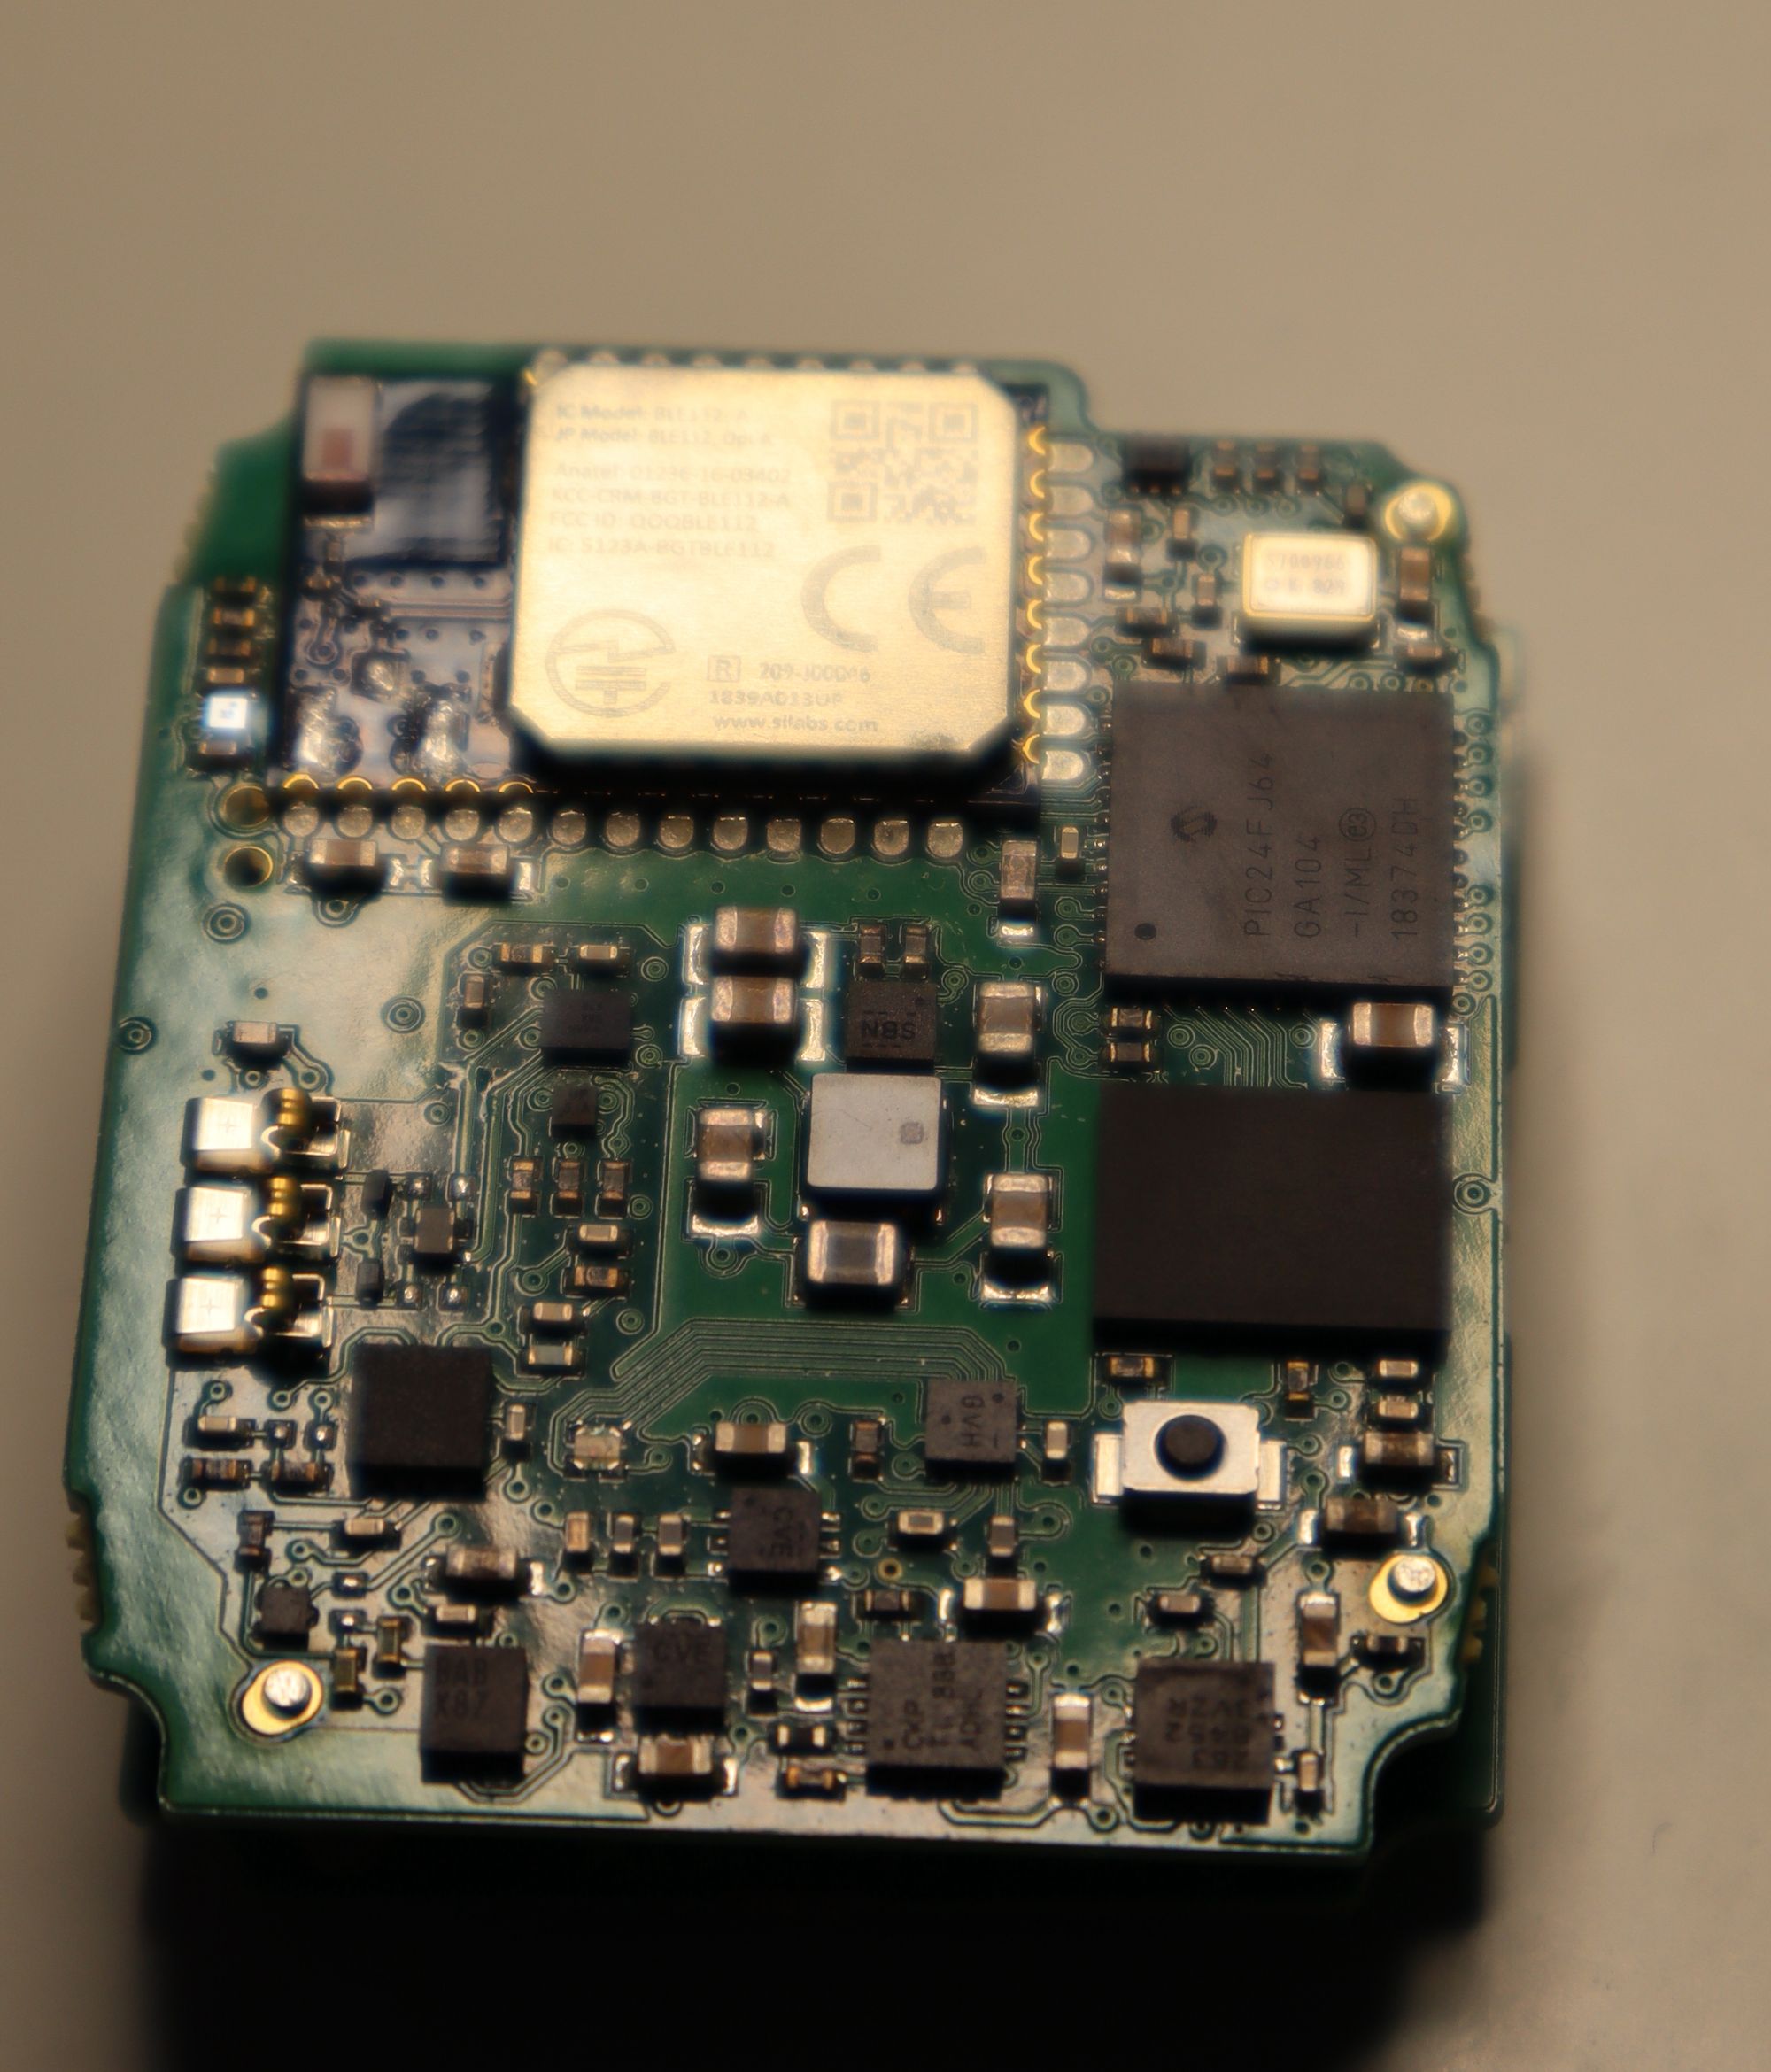
The mechanical design is nice, I think the castellated addition for the optics is a great idea, and they have some nice spring loaded connections to handle the geometry of their sensors. There are two Microchip PIC24Fs as the main MCUs and it uses the silabs BLE112A for comms. It'd be fun to spend a little more time digging into the design, but I'm strapped for time at the moment; maybe in the near future.
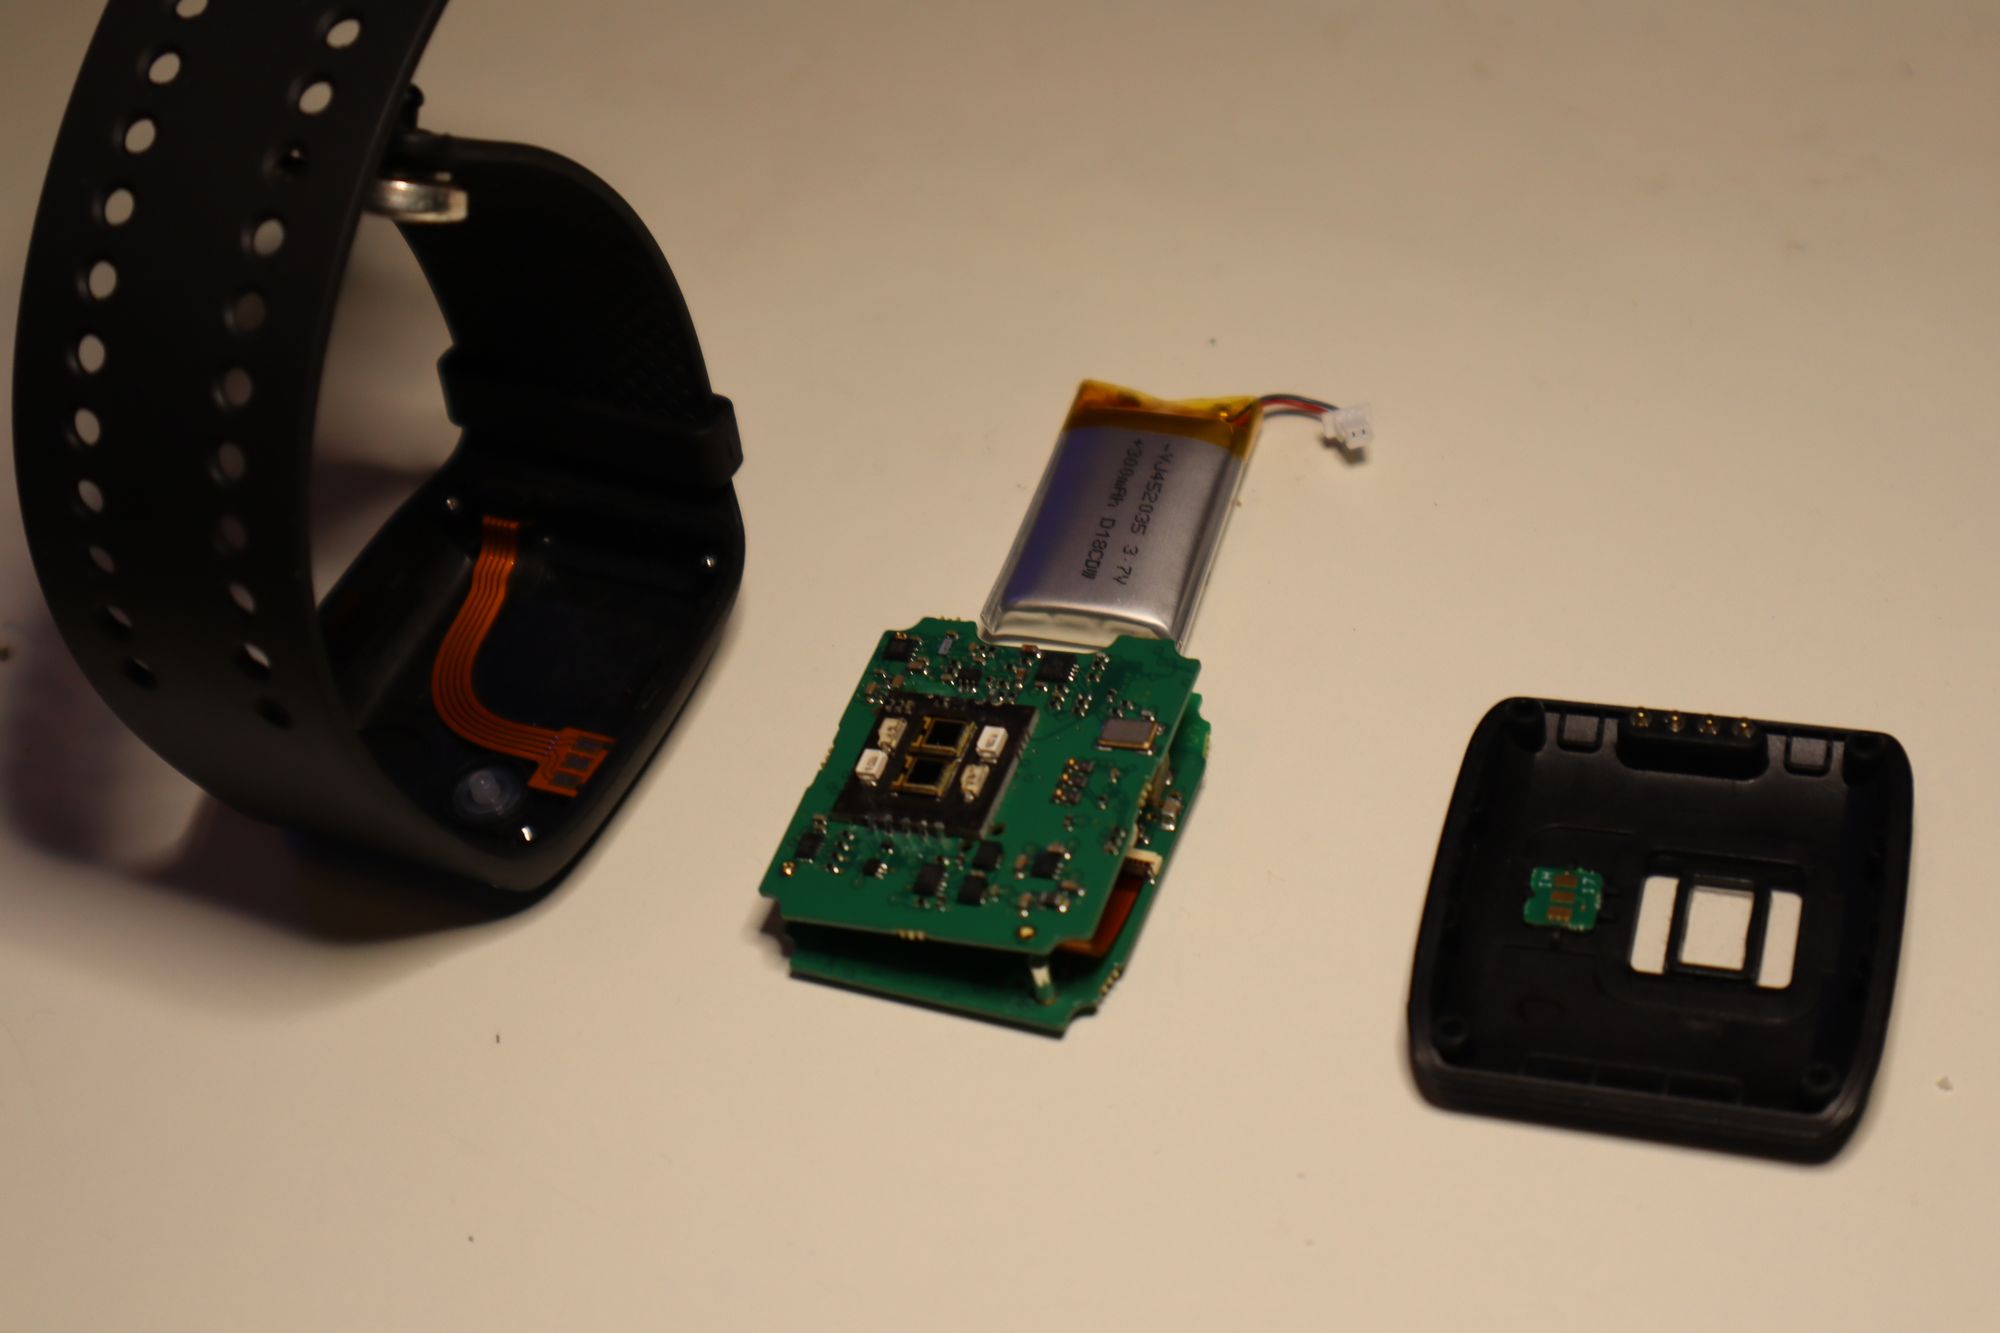
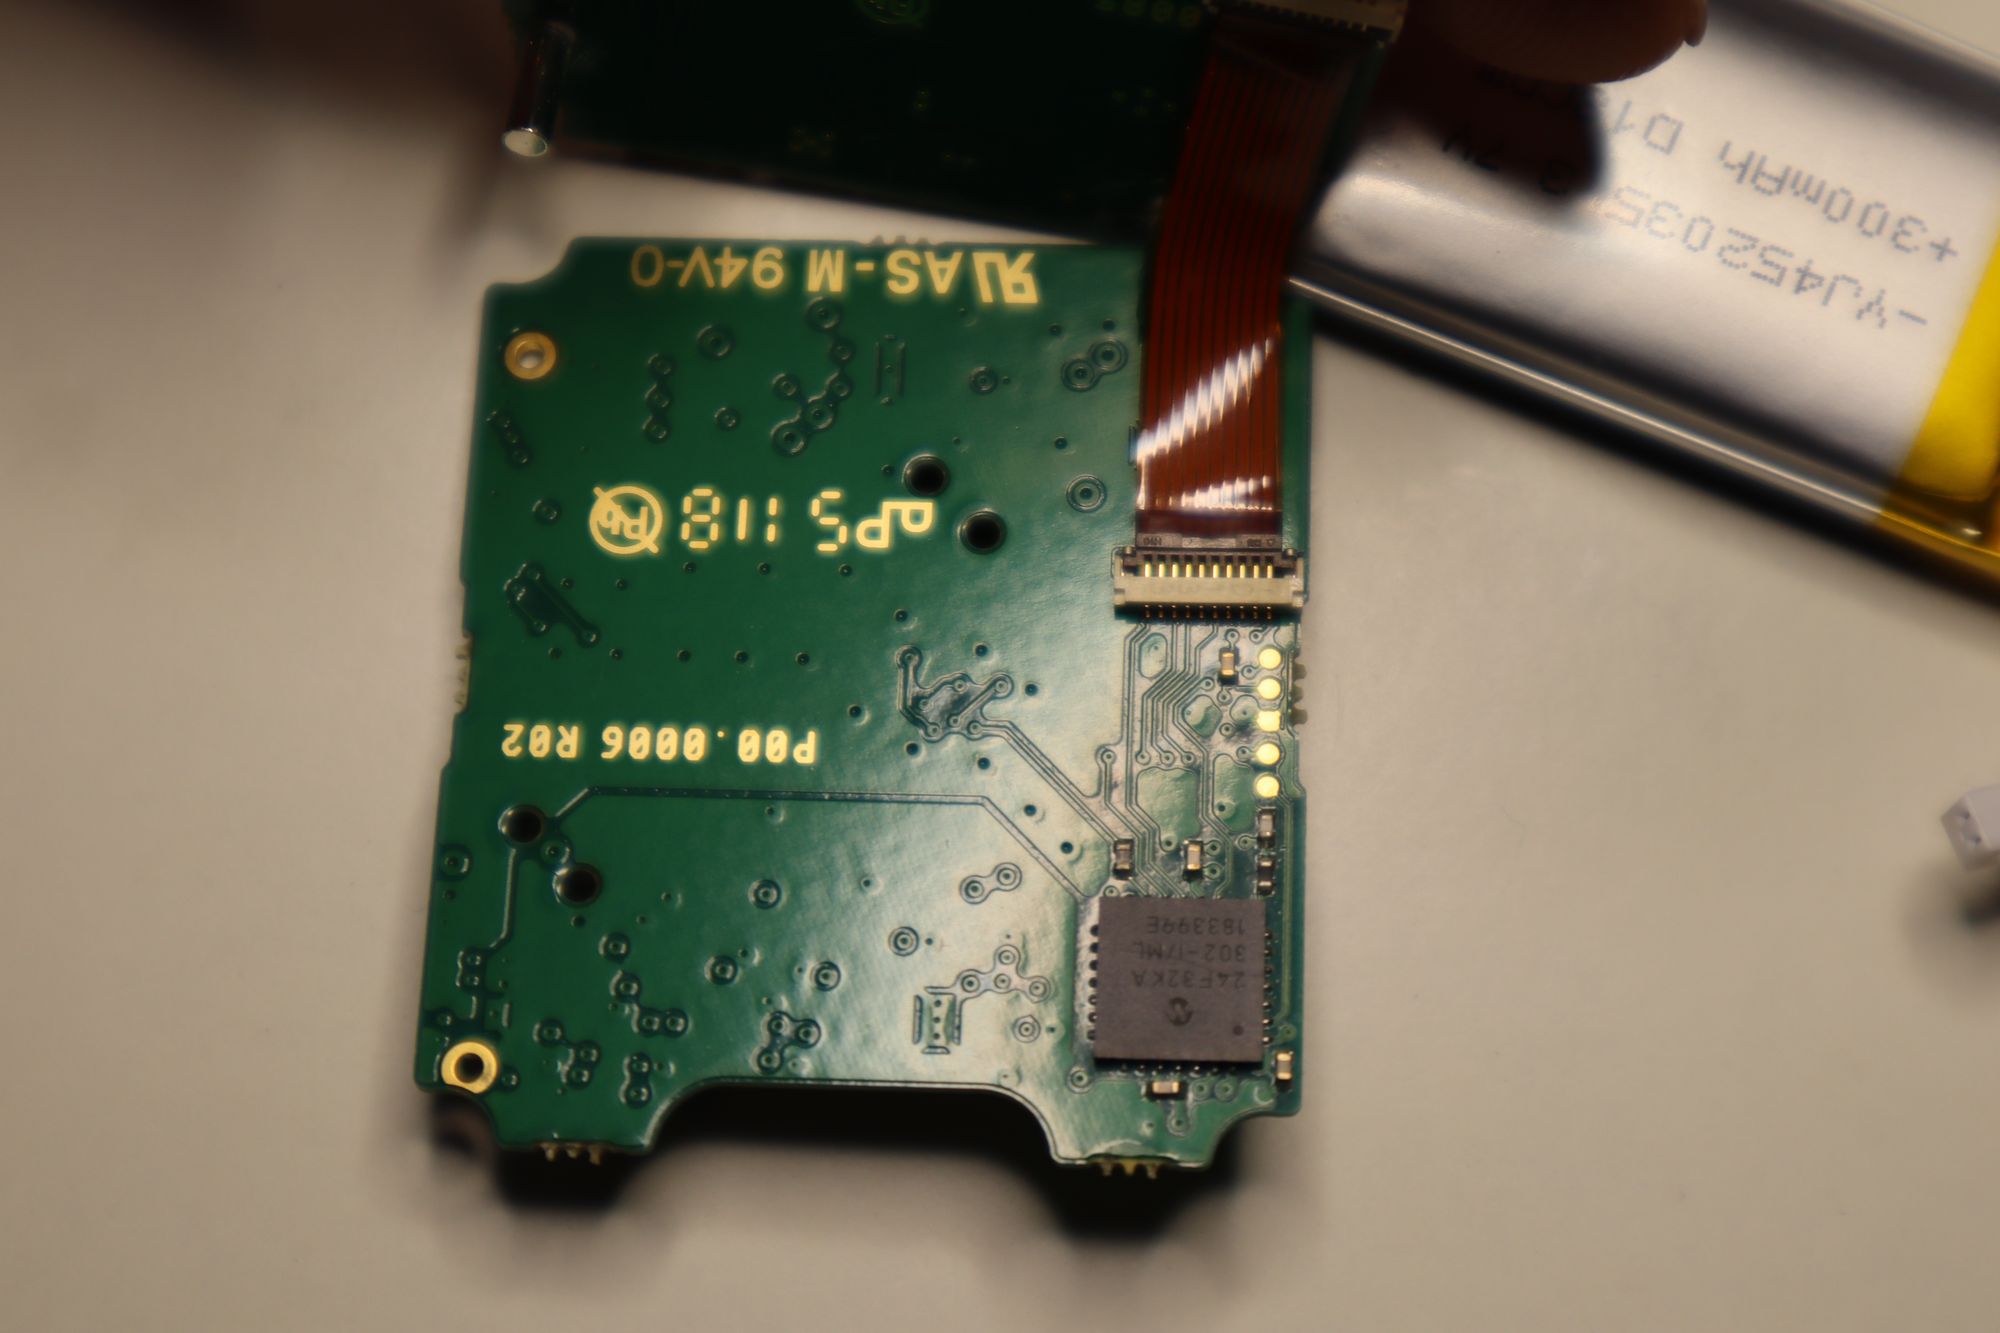
For me, the goal was to get my failing one back up and running after what appeared to be a simple failed lipo battery. You can see in the pictures the battery is bulging; you can also see they use the straight up cell without the normal protection circuit that comes with many off the shelf lipos. I ordered a replacement 300mAh battery and soldered on this JST SH 1.0 Connector and it worked no problem after a little fiddling (gotta get the fit right, the had some uniquely thin 300mAh batteries– and that lack of a protection circuit helps with the size).
Anyway, here are some pics; sorry they're not top-notch, my microscope is packed up for my upcoming move.
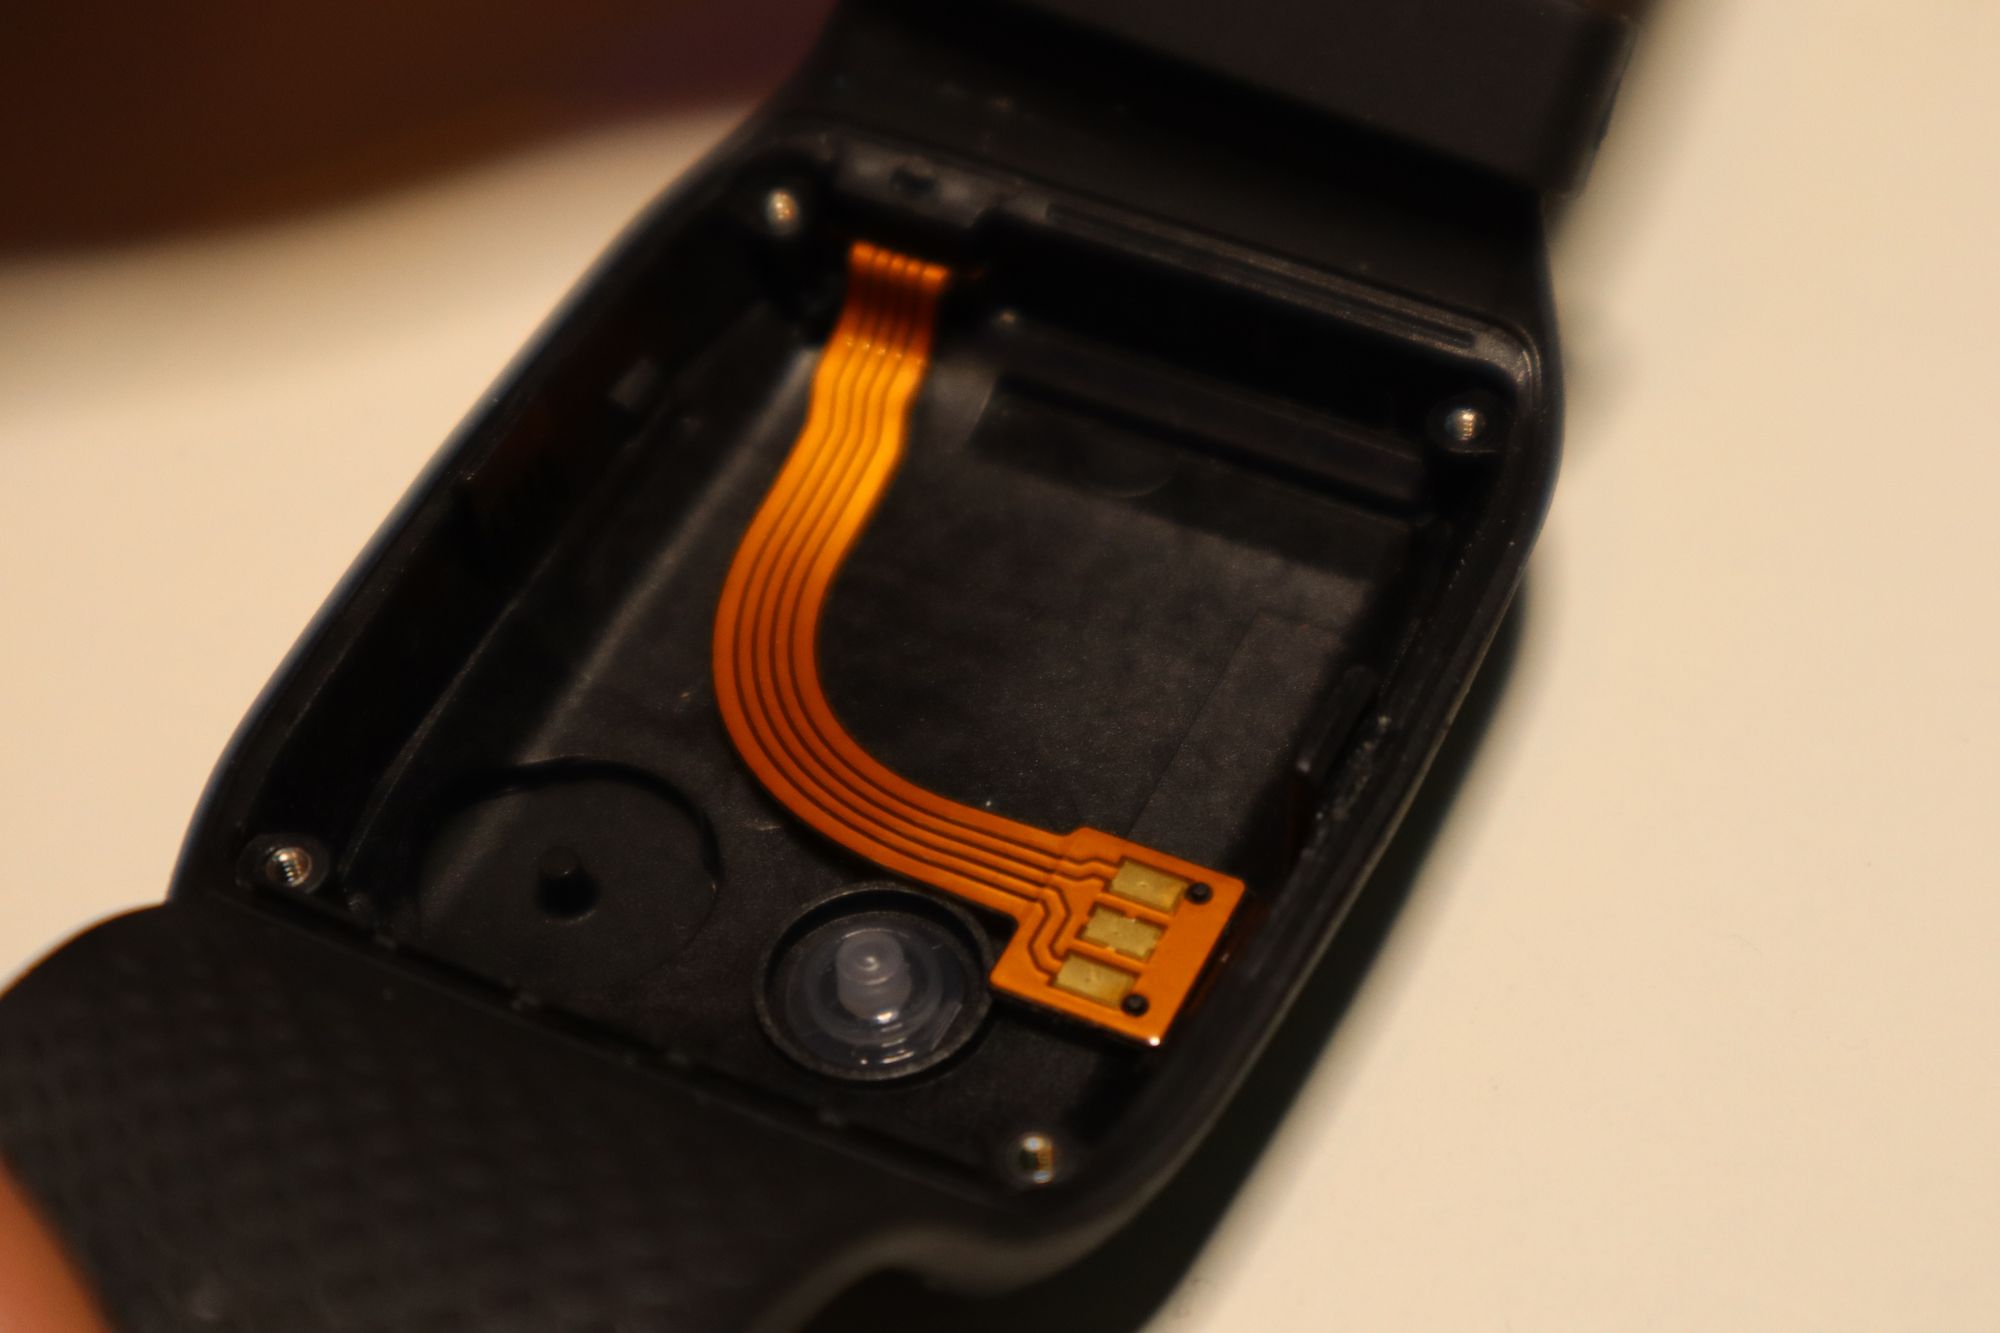
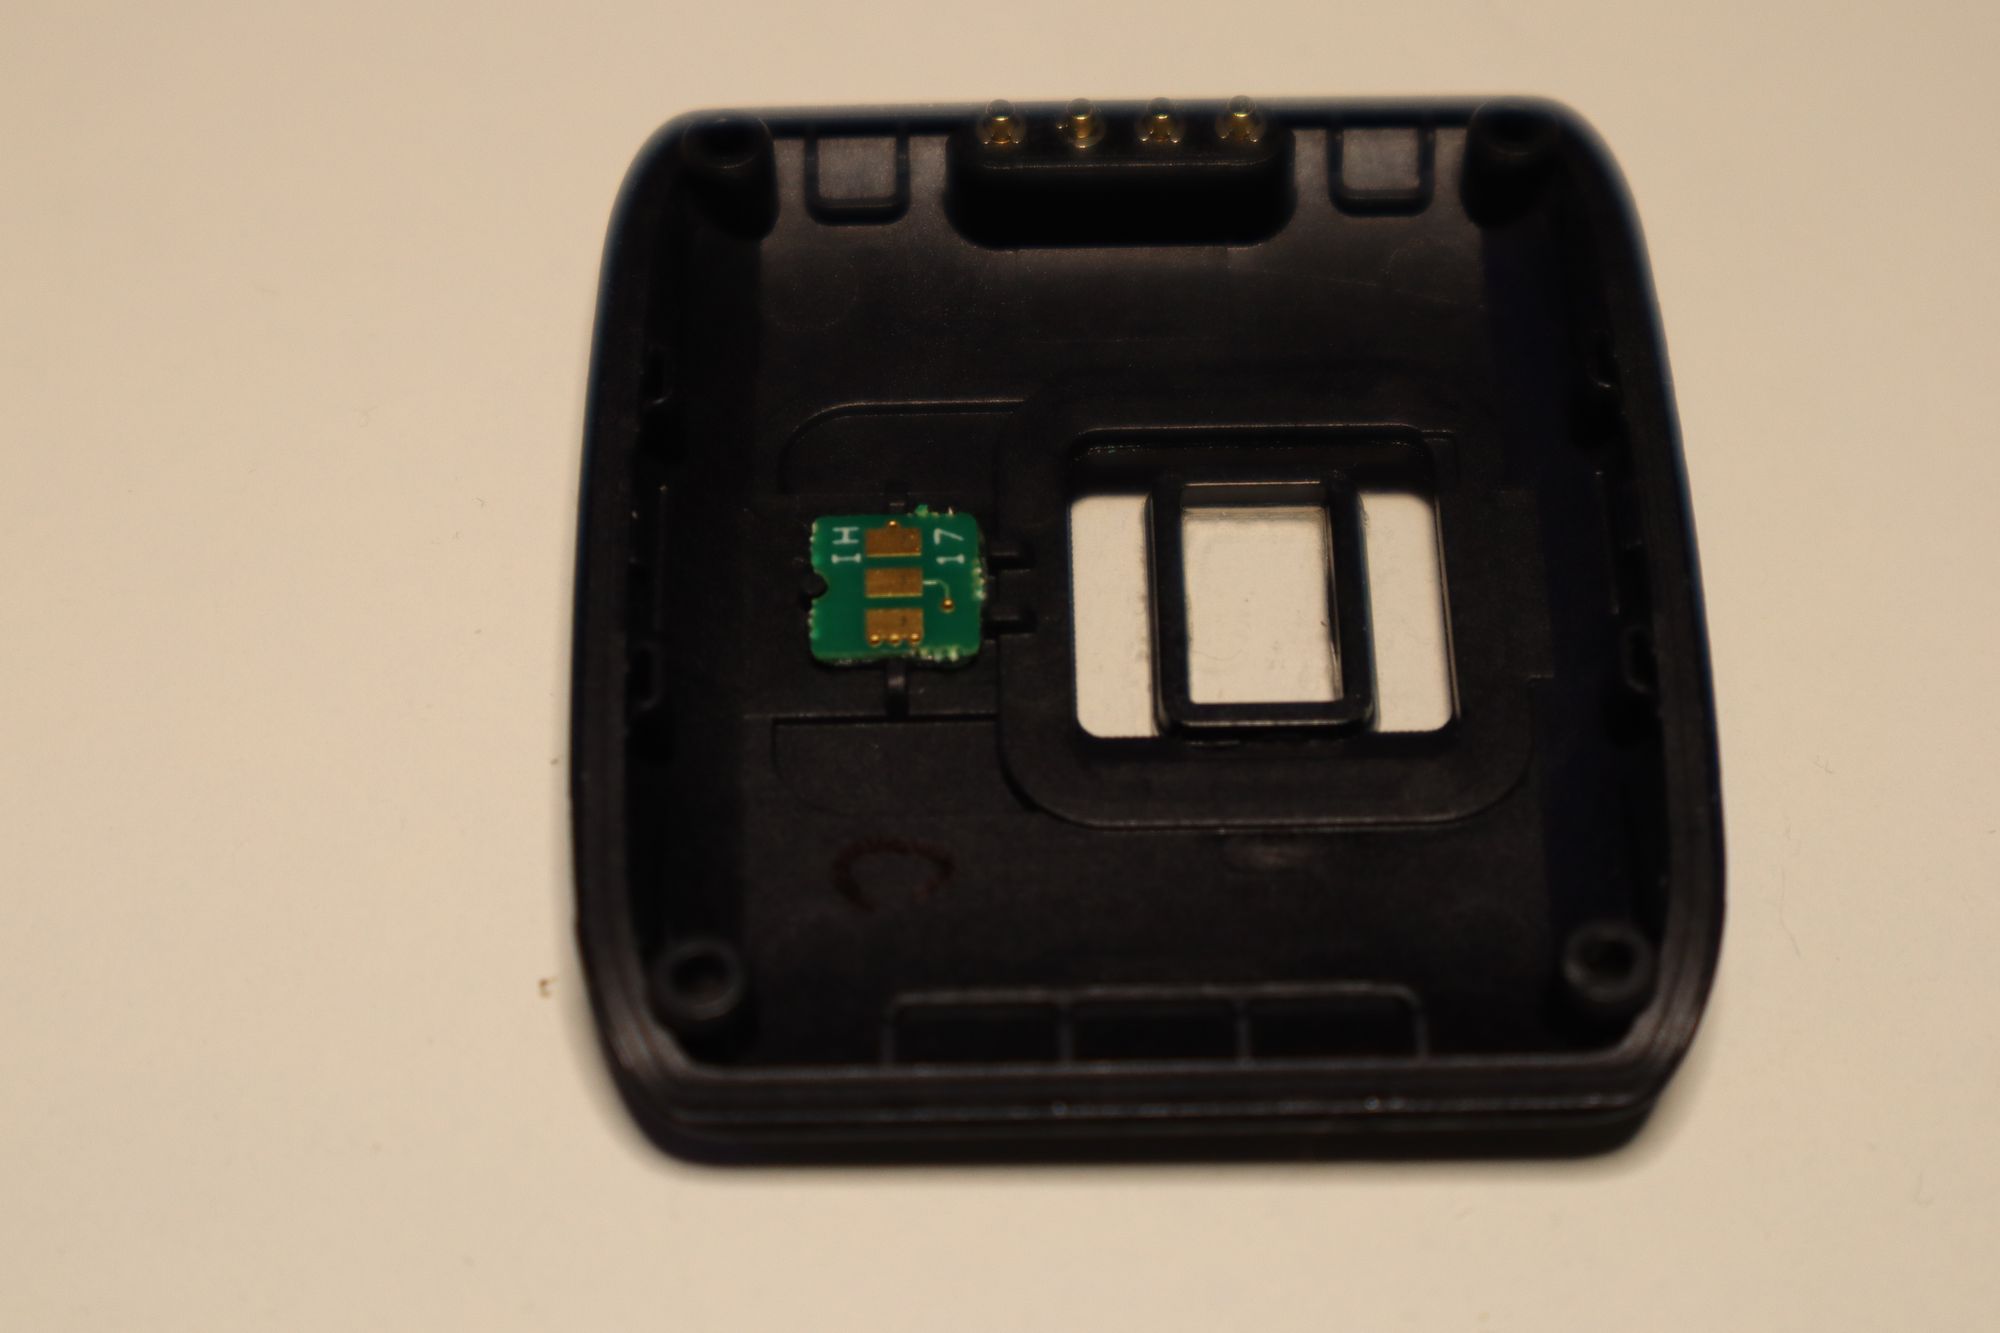
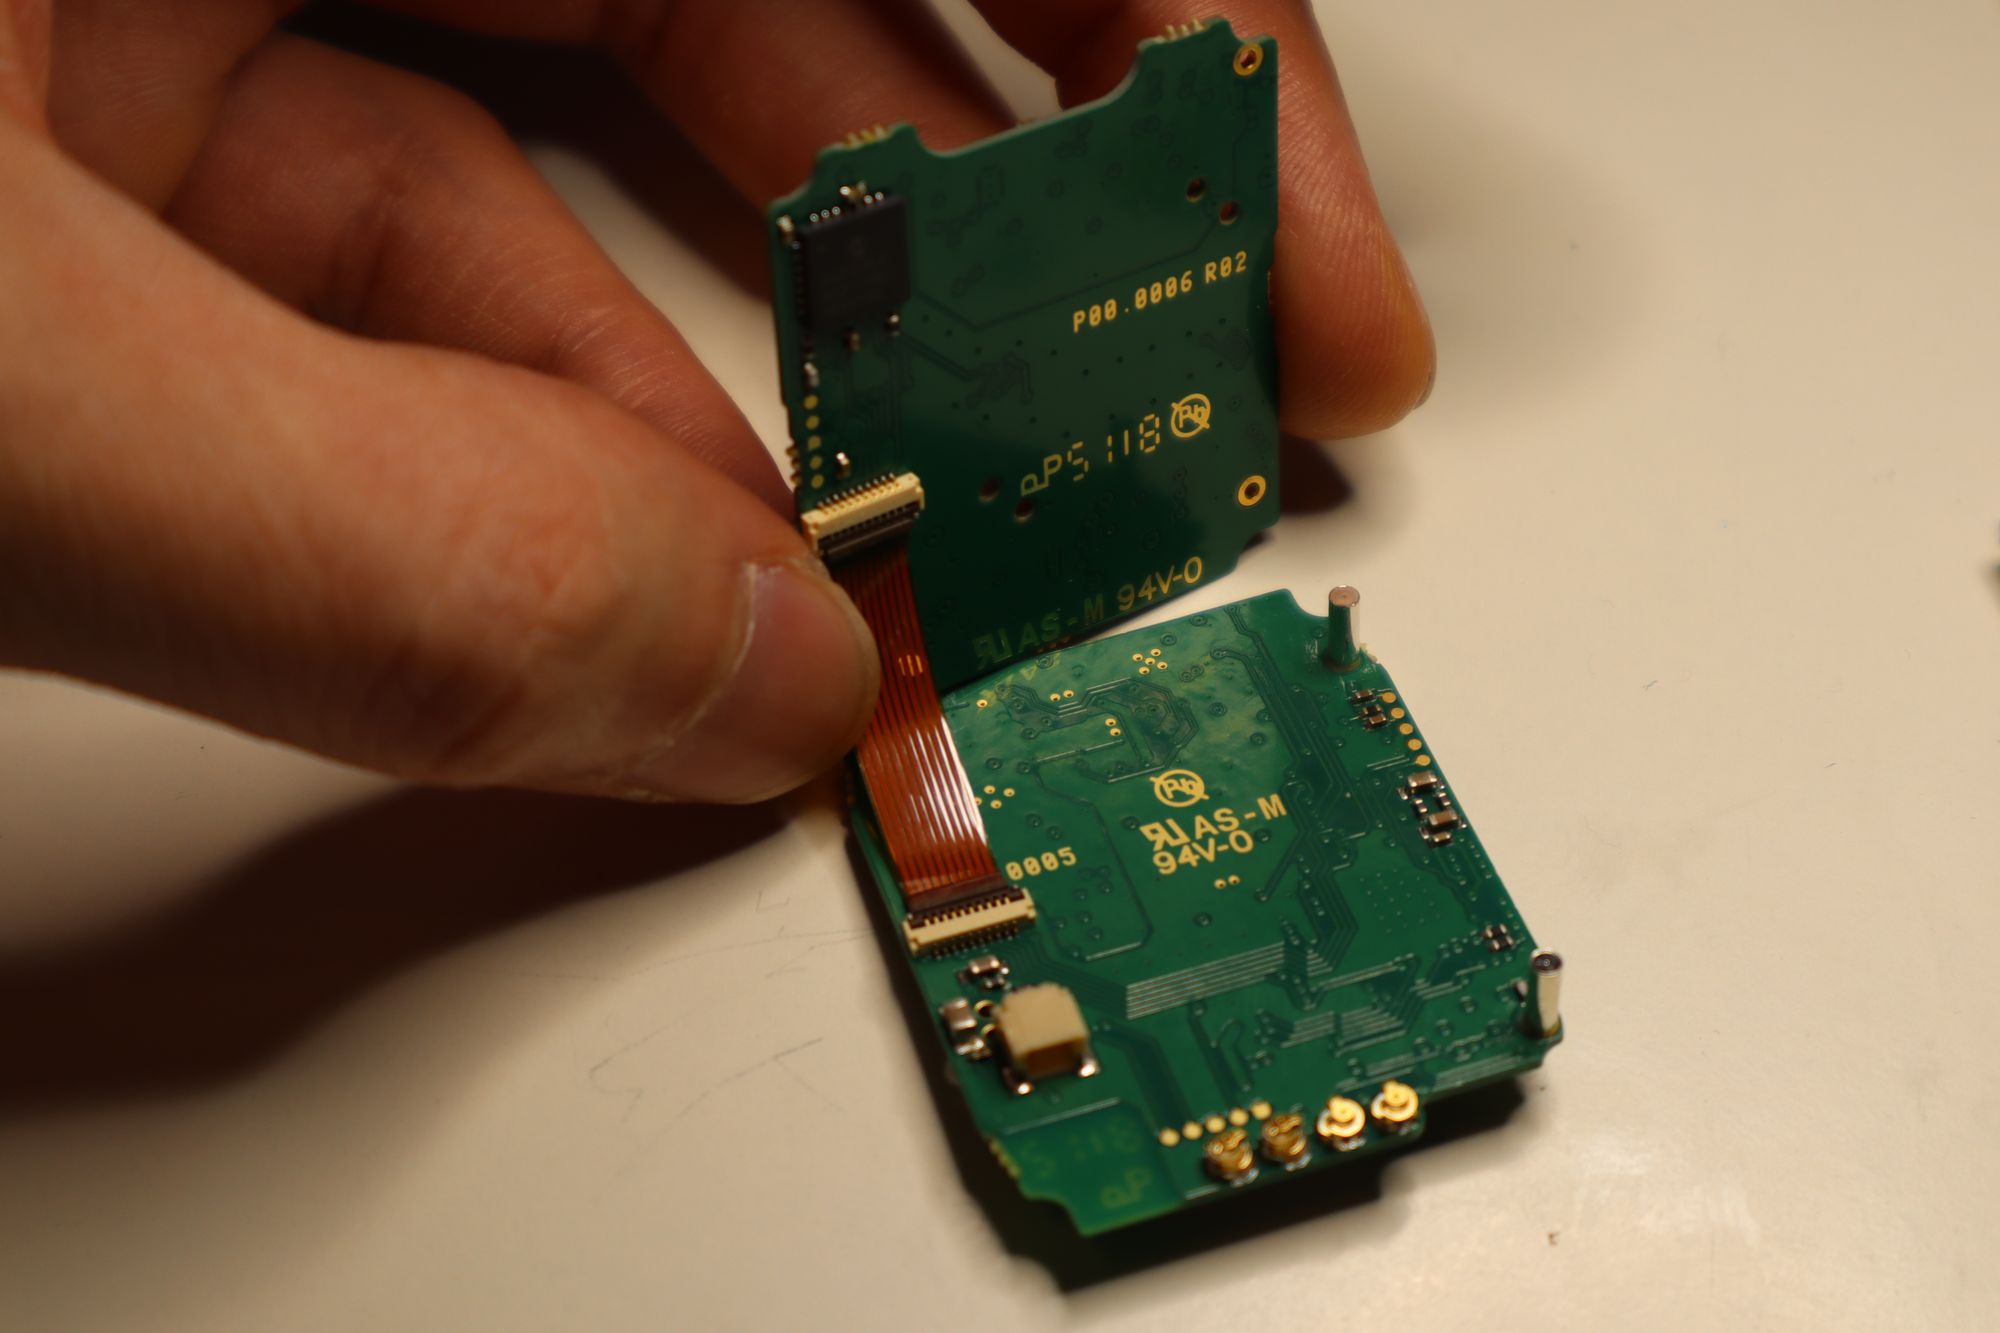
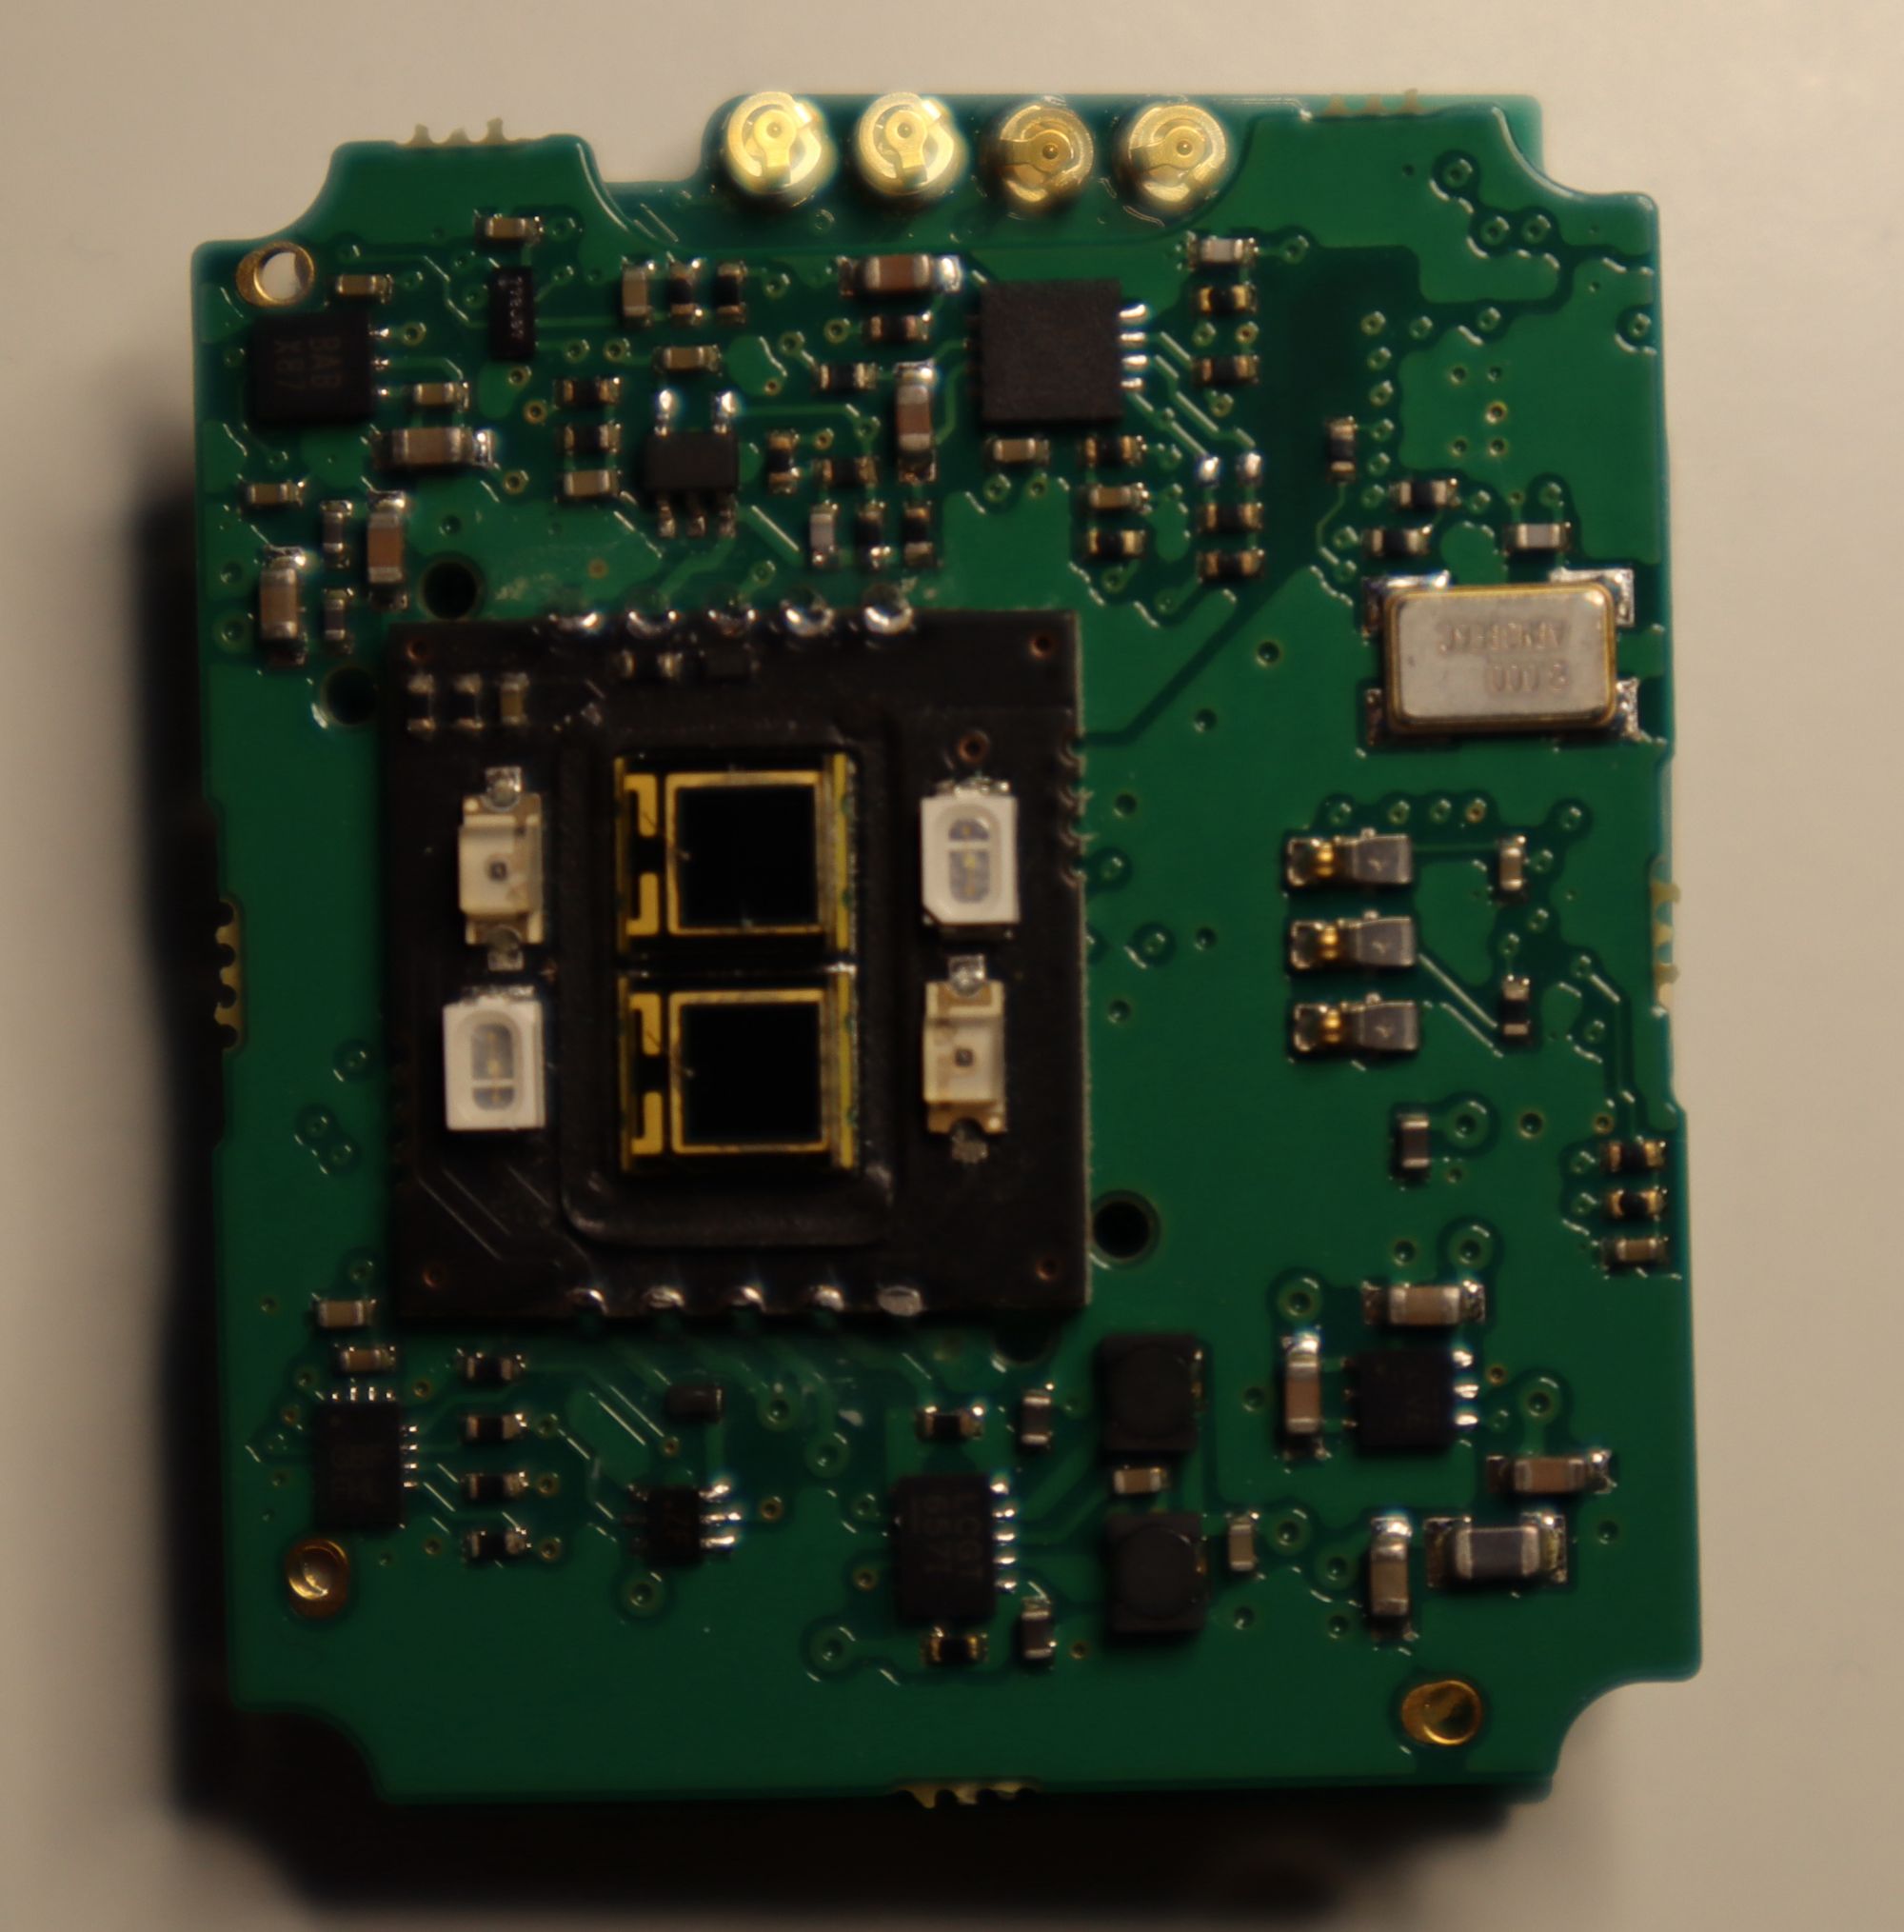
Three parts: the main enclosure, a sandwich of two boards with a lipo in between, and the outer wall. Be careful when unscrewing, the screws have tiny o-rings on them that are pretty important for a tight fit when you're putting it back together.I believe these two traces, surrounded by ground, are injection molded into the bracelet, and actually wrap all the way around through the wristband to connect to the snap on electrodes on the underside of the wrist to measure EDA. Pushbutton on the far left of the picture, lightpipe in the middle.Skin temperature secondary PCB and injection molded pogo pins that connect to the board just above the lipo.A nice sandwich design with a ribbon cable connection and easy to swap 300mAh battery.Without the battery.We can see a PIC24F on the inside face along with the ribbon cable, not a lot else on the inside faces of the two PCBs besides that MCU, the pogo pins, and the battery connector. Some easy to access test points there too.the top PCB featuring the majority of the circuitry. Silabs BLE112A for comms, another PIC24F, SMD spring loaded connections out to that EDA ribbon on the far left, button on the right, assorted other supporting circuitry.The bottom board with the nice castelatted via sensor black sensor board, pogo connections peaking through from the second board below, and three more spring connectors to the tiny temperature sensing board. On the black section we have optics for PPG sensing.
Assistant Professor @ DePaul; PhD '23 @ MIT Media Lab; Fulbright Scholar '10. Experience @ Google AI and Bose Corporation. Pushing technology in ways that support our humanity.